How to Choose the Right Rotary Welding Positioner

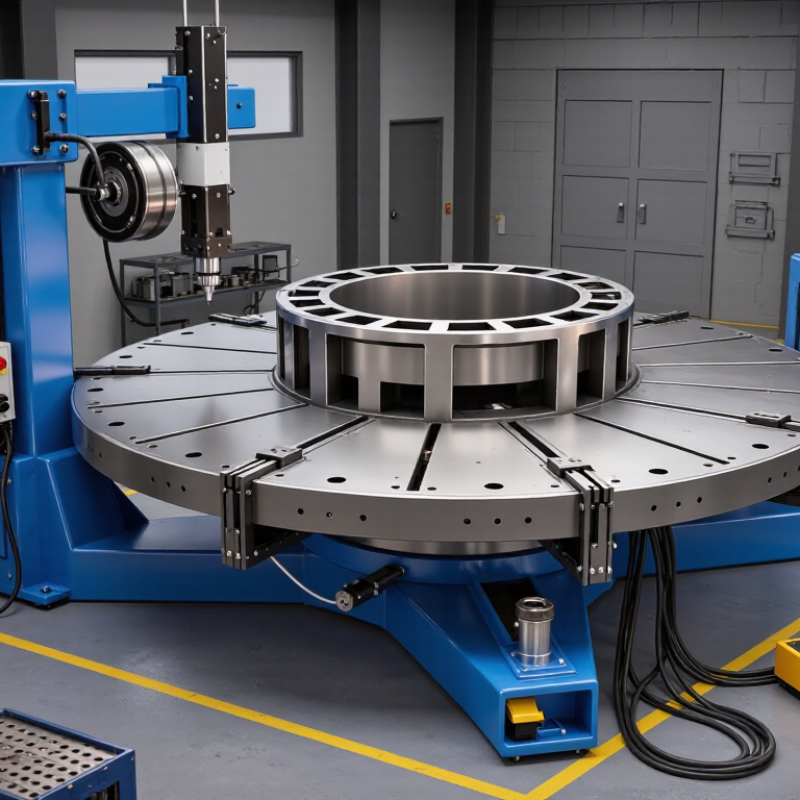
Choosing a rotary welding positioner is not just a matter of matching its rated capacity to a workpiece’s weight. The part’s center of gravity, diameter, and shape affect how safely and smoothly it can rotate. A long frame may create more leverage than its weight suggests. That matters. Before comparing models, consider the heaviest assembly, its mounting points, and how often operators will reposition it.

Rotation speed and control quality also influence the finished weld. Variable-speed operation can help maintain a steady travel speed around a cylindrical part, while a foot pedal may leave both hands available for torch control. Check the table diameter, tilt range, and mounting options against actual fixtures—not just a product photo. Small details count. Also review the duty cycle, drive arrangement, and compatibility with existing power and welding equipment. These checks can prevent an undersized unit from becoming a production bottleneck.

There is no single best rotary welding positioner for every shop. A compact unit may suit lighter, repetitive work, while heavier assemblies may require greater capacity and a wider support base. Ask suppliers for load limits under the intended orientation, not only headline ratings. If the workpiece has an uneven center of gravity, discuss it directly; standard specifications may not tell the whole story. Selection takes judgment. This guide outlines practical features to compare, questions to ask, and trade-offs worth considering before you choose a positioner for your welding process.
How to Choose the Right Rotary Welding Positioner

Identify the Workpiece and Welding Requirements

Before selecting a rotary welding positioner, describe the workpiece in practical terms. Record its weight, length, diameter, and overall shape. Start with the part. A long pipe with a heavy flange may balance differently from a compact, evenly weighted drum. Include clamps, backing bars, and other fixtures in the total load. The fixture changes both weight and center of gravity.

Next, define the weld itself. Note the joint type, weld length, material thickness, and positions the operator needs to reach. Will the part need slow rotation for a continuous seam, or frequent repositioning for several short welds? Consider the welding process and the space around the joint. A large assembly can look easy to turn on paper, yet block torch access once mounted. That matters.

Match these details to the positioner’s rated load, table size, tilt range, and rotation speed. Check the load rating with the workpiece and fixture together, not the bare part alone. If the center of gravity sits far from the table, ask how that affects allowable capacity. In practice, estimates can be off, especially with irregular fabrications. A trial setup with a representative fixture can reveal wobble, poor access, or awkward clamping before the positioner becomes part of a production cell.
Match Positioner Capacity to Workpiece Size and Weight

A rotary welding positioner should be sized for the complete rotating assembly, not just the bare workpiece. Add the part, clamps, backing bars, and any fixture plate. A 300-kilogram vessel can become a much heavier load once its supports are included. Check the positioner’s rated capacity and load chart, including any stated center-of-gravity limits.

Size matters too. A long frame or tank may fit on the table but extend far beyond its center. That offset increases leverage and can strain the tilt system during rotation. Measure the workpiece and fixture together, then compare their dimensions and balance point with the machine’s specifications. Leave room for clamps, weld access, and nearby equipment. Clearance is easy to overlook.

Even a careful estimate can miss a detail. A heavy clamp mounted at one end may shift the balance enough to cause uneven movement. Ask the supplier or a qualified engineer to review unusual shapes, off-center loads, and planned rotation speeds. Consider how often the unit will run; frequent production may call for a different duty rating. Don’t choose capacity by weight alone. A controlled test with the actual fixture can reveal awkward movement before regular welding begins.

Compare Rotation Range, Speed, and Control Options

Rotation range should match the weld path, not simply the largest number on a specification sheet. Confirm whether the table provides continuous 360-degree rotation, and check any tilt range separately. A long vessel may need a clear sweep without striking the floor or torch cables. Check rated load at the workpiece’s actual center of gravity, too. Capacity can fall when a heavy fixture sits far from the table. Measure the assembly before comparing models.

Speed matters when maintaining a steady weld pool. Choose a positioner with a low, stable minimum speed and smooth adjustment; abrupt starts can spoil a tack or bead. Verify speed under load, not only at an empty-table rating. Control options should fit the process: foot pedals help with manual starts, while pendant controls support precise positioning. For automated cells, confirm signal compatibility and repeatable speed commands. The International Federation of Robotics’ World Robotics 2024 report counted 4,281,585 industrial robots operating worldwide in 2023, up 10% year over year. That figure reflects growing automation, but it does not prove every shop needs integration. Keep it simple. A control package can be more complex than the job requires, and that deserves a second look.

How to Choose the Right Rotary Welding Positioner - Compare Rotation Range, Speed, and Control Options
Positioner configuration Workpiece rotation range Typical rotation speed Control options Best suited for Key selection checks
Single-axis, fixed horizontal table Continuous 360° rotation; the table can keep turning while the workpiece is welded. Commonly adjustable in a low-speed band, often around 0.1–1.0 rpm. Actual range depends on the model and load. Basic models may use a foot pedal and speed dial; others include a handheld control. Parts that need to rotate around one horizontal axis, such as flanges, rings, and cylindrical assemblies. Check rated load, table diameter, rotation speed at the intended load, and whether the pedal allows convenient start/stop control.
Single-axis, variable-speed positioner Continuous 360° rotation. Speed can be adjusted to suit different joint sizes and welding travel speeds. Confirm the available rpm range and stability at the lowest setting. Usually offers a speed control, foot pedal, or handheld control; some systems accept a remote or external start/stop signal. Workshops handling varied part sizes or changing welding procedures. Look for smooth low-speed operation, repeatable speed adjustment, and a control layout that can be used safely while welding.
Tilting rotary positioner Typically continuous 360° table rotation, with a separate tilt axis. Common tilt ranges include 0–90°; some designs provide a wider range. Rotation and tilt speeds are separate specifications. Rotation is generally adjustable; tilt is often slower and may be powered or manually set, depending on the design. May have separate controls for rotation and tilt, plus a foot pedal for rotation. Tilt may use a hand control or mechanical adjustment. Parts that need to be angled to improve access, weld position, or fixture loading. Verify tilt range under the intended load, center-of-gravity limits, clearance around the fixture, and whether tilt can be controlled without entering a pinch zone.
Two-axis headstock-and-tailstock system Workpiece rotation is typically continuous through 360°. The assembly can also be repositioned through its tilt or elevation axis, depending on the system. Rotation speed is selected for the workpiece and welding process; larger or heavier assemblies may require lower speeds. Check rated performance at the actual load. Can use coordinated or separate controls for rotation and positioning; more advanced setups may support remote or integrated controls. Long or bulky fabrications that need support at both ends during rotation. Check the distance between supports, alignment, load capacity at the actual center of gravity, and how the tailstock accommodates different workpiece lengths.
Programmable or automation-ready positioner Usually continuous 360° rotation; the controller may also support defined angles or repeatable motion sequences. Speed and motion profiles are set through the control system. The usable range is model-specific and should be confirmed with the workpiece attached. May provide stored settings, encoder feedback, remote I/O, or an interface for integration with a welding system. Repeat production, consistent weld sequences, and automated or semi-automated cells. Confirm repeatability requirements, interface compatibility, safeguarding, and whether programmed motion is permitted for the intended process and setup.
Selection note: Speed figures are indicative rather than universal specifications. Actual speed, tilt range, and capacity vary by design and may be limited by workpiece weight, diameter, center of gravity, and fixture arrangement. Confirm the manufacturer’s ratings for the complete setup before selecting or operating a positioner.

Check Compatibility with Welding Equipment and Shop Layout

Check the positioner against the complete welding setup, not just the workpiece. Its rated capacity must cover the part, fixture, and any clamps, with the load’s center of gravity within the specified limits. Measure twice. A large table may hold the assembly but leave too little room for the torch, cables, or operator. Confirm that rotation speed and tilt range suit the weld sequence, and check whether controls can communicate with the welding equipment. Cable routing matters. Cables stretched across a moving joint can snag, wear, or restrict travel. A slow dry run with the actual torch and fixture can reveal problems a specification sheet misses.

Shop layout affects both installation and daily use. Measure the positioner’s footprint, then allow space for loading, unloading, maintenance, and safe operator access. Check ceiling height and overhead clearance, especially when parts are tilted or moved by a hoist. Leave room for fume extraction and nearby equipment, too. In practice, a clean floor plan can still mislead: a door swing, column, or cart route may block access once the station is running. Mark the proposed footprint on the floor and test the loading path with a representative part. It may feel overly cautious. It is cheaper than relocating a machine after installation.

Review Safety Features, Maintenance, and Support

A rotary welding positioner should be judged by more than its load rating. Review the emergency stop, foot control, cable routing, guarding, and stability with the workpiece mounted. BLS data from the 2023 Survey of Occupational Injuries and Illnesses reports 2.8 recordable cases per 100 full-time workers in manufacturing, compared with 2.4 across private industry. These figures are not specific to positioners, but they underline why safe setup matters. OSHA’s machine-guarding and hazardous-energy-control requirements also offer useful checks when reviewing equipment and service procedures.

Tips: Ask for a live demonstration using a workpiece similar in size and shape to yours. Test the stop control, inspect pinch points, and confirm the load stays balanced through a full rotation. Small details matter.

Maintenance and support affect uptime. Check how easily operators can inspect bearings, gearboxes, cables, and controls, and ask for recommended inspection intervals and parts availability. A clear service plan is useful; a vague promise of “quick support” is not. Confirm who handles troubleshooting, what response times are typical, and whether technicians can provide training. I would not assume every shop needs the same service package. A dusty, high-cycle production cell may need more frequent checks than a low-volume workshop. Keep a simple log of unusual noise, vibration, and repairs; it can reveal wear before a failure stops the line.

Contact Us