2026 Best Benchtop Welding Positioner Buying Guide
Choosing the right benchtop welding positioner can change how a small fabrication project feels. A stable workpiece turns awkward welds into controlled movements. It also reduces unnecessary repositioning, uneven travel speed, and fatigue during long sessions. In 2026, buyers should look beyond advertised rotation speed. A fast unit is not automatically a useful unit.
Welding educator Jody Collier has emphasized a practical principle: “A positioner should improve puddle control, not simply rotate the workpiece.” That idea matters when comparing compact machines. Check the rated load, chuck size, mounting surface, rotation range, and speed adjustment. Watch for smooth starts. Abrupt movement can disturb a carefully placed tack weld. Grounding quality also deserves attention, especially when stainless steel or thin sections are involved.
Small details matter.
This guide examines current benchtop welding positioner options for workshops, maintenance teams, and serious hobby fabricators. It considers real working conditions, including limited bench space, irregular parts, heat buildup, and repeated setup changes. Some products look impressive online but feel unstable under an off-center load. Others offer strong torque but lack fine speed control. That trade-off is easy to miss.
No buying guide can predict every fabrication task. A positioner that suits a 100-millimeter pipe may struggle with a wide bracket. Measure your parts first. Leave room for clamps, cables, and safe hand movement. The best choice is rarely the most powerful model. It is the machine that gives you predictable rotation, secure holding, and enough control to produce consistent welds. Be willing to reconsider the specification sheet. Real workshop behavior matters more.
Understanding Benchtop Welding Positioners and Their Core Functions
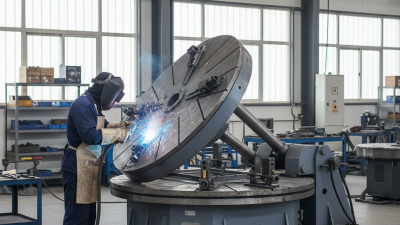
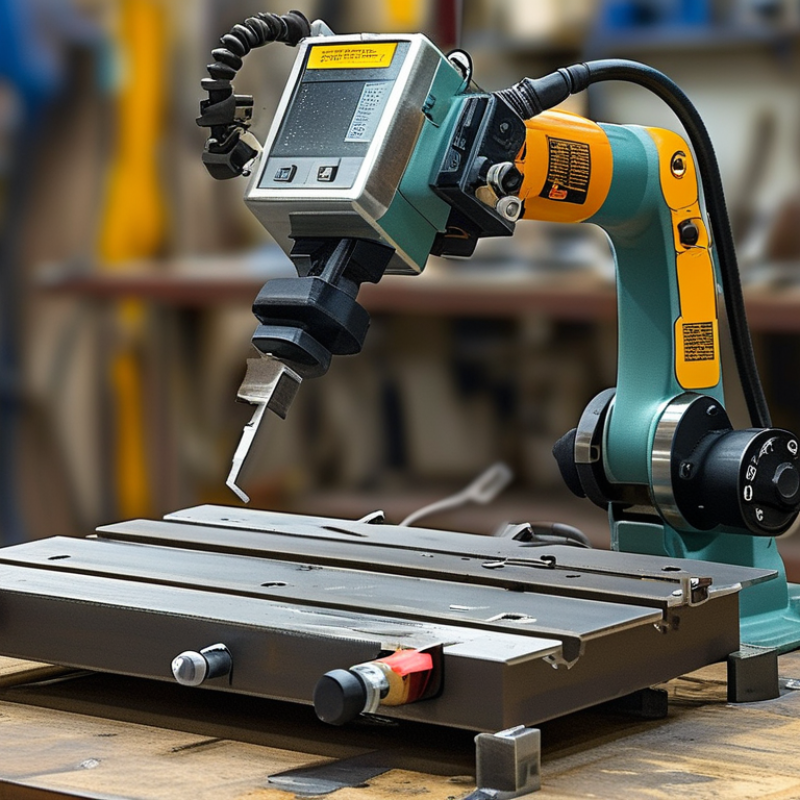
A benchtop welding positioner rotates and supports small workpieces during welding. It helps maintain a steady torch angle and consistent travel speed. This matters when joining rings, brackets, flanges, or short cylindrical parts. The worktable usually turns through adjustable speed settings. Some models also provide tilting movement for better access. A stable positioner can reduce awkward wrist movement and uneven bead profiles.
Its core function is controlled rotation, not automatic welding. The operator still manages amperage, filler metal, shielding gas, and torch distance. In practical workshop use, smooth low-speed movement is often more valuable than maximum speed. A strong chuck or fixture prevents the workpiece from shifting. Check the rated load carefully, especially when the part is mounted off-center. An unbalanced piece may create vibration and spoil an otherwise sound weld. I have seen operators focus on motor power and overlook fixture alignment. That choice can cause more problems than it solves.
Tips: Test the lowest speed before welding. Mark the workpiece’s centerline. Keep cables away from moving parts. Use a foot control when repeated starts are required. Confirm the table is level and grounded according to the equipment instructions. Make a short practice run with scrap material. It may feel unnecessary, but it reveals wobble, poor access, and unsuitable speed early. Recheck the setup after the first completed weld. Small corrections often improve the final result.
Matching Positioner Specifications to Your Welding Requirements
2026 Best Benchtop Welding Positioner Buying Guide
Matching Positioner Specifications to Your Welding Requirements
Choosing a benchtop welding positioner starts with the workpiece, not the machine’s advertised speed. Measure the part, fixture, and clamps together. Their combined weight must stay below the rated load, with a safety margin. A 50-kilogram rating may not suit an off-center assembly. Its balance can create excessive torque during rotation.
For small brackets, a compact table with adjustable rotation speed may be enough. Thin steel often needs slow, steady movement to prevent heat distortion. Larger cylindrical parts need stronger torque and a secure chuck or faceplate. Check the table diameter, mounting holes, and tilt range before ordering. A positioner that cannot hold your fixture is expensive bench furniture.
In daily fabrication, I also examine duty cycle and control response. Continuous welding demands better cooling than occasional repair work. Foot controls can improve accuracy when both hands hold the torch and filler rod. Confirm the input voltage, grounding method, emergency stop, and enclosure quality. These details affect reliability more than polished marketing language.
I once underestimated an uneven load and noticed vibration at higher speed. The weld remained acceptable, but the finish suffered. That mistake changed my selection method. Now I test balance, cable movement, and access around the joint before judging performance. A perfect specification sheet still cannot replace a practical fit test.
Comparing Rotation, Load Capacity, Speed, and Control Options
2026 Best Benchtop Welding Positioner Buying Guide
Choosing a benchtop welding positioner in 2026 starts with the joint, not the catalog headline. In shop testing, smooth rotation matters more than impressive top speed. A 2 rpm range suits many circumferential welds, while faster settings help tack work and small fixtures. Confirm whether the stated speed applies under load. It often does not. A positioner that jerks near zero speed can disturb arc length and create uneven bead width. Check indexing accuracy, table runout, and reverse response before buying. These details reveal build quality better than a polished specification sheet.
Load capacity needs careful reading. Manufacturers may list a centered, balanced load, but a long pipe creates leverage. Calculate the offset, fixture weight, and workpiece center of gravity. A practical margin of 25 to 30 percent reduces motor strain and unwanted table movement. I once underestimated a fixture’s weight; the motor survived, but rotation became hesitant. That was my error. Capacity is not only kilograms. It includes diameter, overhang, clamping method, and duty cycle. Ask for rated capacity at the intended speed, not an unloaded maximum.
Control options affect repeatability and operator fatigue. Foot pedals support hands-free welding, while a pendant allows precise starts, stops, and direction changes. Variable-speed control is essential for heat-sensitive parts. Remote interfaces can help integrate a torch or automation system, but compatibility must be verified. Keep controls readable through welding glare. Emergency stopping should be immediate and easy to reach. Before purchase, run a sample fixture through several cycles. Real work exposes weaknesses that a brochure hides.
Evaluating Workholding Features, Safety, and Build Quality
A benchtop welding positioner should hold work firmly before it rotates smoothly. Check the rated load, jaw opening, table diameter, and speed range. A practical test uses a steel coupon, a dial indicator, and a slow rotation cycle. Excessive runout can distort a fillet weld or force awkward torch movement. Clamping surfaces should resist heat, spatter, and repeated tightening. Look for replaceable jaws and accessible fasteners.
Safety deserves equal attention. The International Labour Organization estimated 2.93 million work-related deaths and 395 million non-fatal injuries globally in 2019. The U.S. Bureau of Labor Statistics recorded 5,283 fatal occupational injuries in 2023. These figures are not positioner-specific, but they show why small safeguards matter. Choose guarded gears, stable feet, insulated controls, and a clearly marked emergency stop. Cable routing should prevent snagging during rotation. Good ventilation remains essential because a positioner does not remove welding fumes.
Build quality appears in small details. Welded frames should show consistent beads, without sharp unfinished edges. Bearings should turn without grinding or side play. Ask for load ratings under rotation, not only static support. A sealed control enclosure helps in dusty workshops. Certification claims still need verification. I have seen sturdy-looking tables develop loosened bolts after repeated heat cycles. That weakness is easy to miss. Record inspection dates, bolt checks, and unusual vibration. A buying decision should include that maintenance burden, not just purchase price.
2026 Best Benchtop Welding Positioner Buying Guide
Recommended evaluation weighting for comparing benchtop welding positioners without relying on brand-specific data.
How to use this chart: Give priority to rated load capacity, secure workholding, safety controls, and rigid construction. Confirm that the positioner’s chuck or fixture system matches the workpiece size, while variable-speed control and compatibility support consistent welding results.
Selecting, Setting Up, and Maintaining the Right 2026 Model
Selecting a 2026 benchtop welding positioner starts with the workpiece, not the advertised speed. Check load capacity at the actual center of gravity. A 30 kg part may exceed the safe torque limit when mounted off-center. Choose variable rotation, adjustable tilt, and a replaceable faceplate. Low-speed control matters for thin sections. According to the U.S. Bureau of Labor Statistics’ 2024 Occupational Outlook Handbook, the welding field may see about 42,600 openings annually through 2033. Efficient positioning can reduce operator fatigue and repeated handling.
During setup, bolt the positioner to a rigid, level bench. Confirm the rotation axis before clamping the fixture. Use a separate work return path unless the manufacturer specifically allows current through the bearings. Keep cables clear of the rotating table. The AWS Welding Handbook emphasizes joint access, stable fixturing, and controlled heat input. These details affect weld quality more than maximum rotation speed. I have found that a simple alignment mark often prevents expensive rework.
Maintenance should include cleaning spatter after every shift and checking faceplate runout regularly. Inspect clamps, gear teeth, cables, and emergency stops before production. ISO 21940 balancing guidance also supports checking rotating assemblies when vibration appears. Lubricate only with the specified product. Too much grease attracts abrasive dust. My first maintenance plan was overly complicated, and operators ignored it. A short checklist worked better. Record unusual noise, slipping, or temperature changes before they become failures.