Why Choose White 3D UV TPU DTF Film?
Why Choose White 3D UV TPU DTF Film?
White 3D UV TPU DTF Film is gaining attention among decorators seeking raised texture, bright color, and flexible surface performance. Unlike flat transfer films, it can create a tactile finish that catches light across logos, lettering, and small graphic details. The white foundation also improves color visibility on dark or transparent substrates.
Textile-printing specialist Debbie McKeegan states, “Digital decoration must be judged by performance, not novelty.” That principle matters here. A striking sample proves very little without testing adhesion, curing, flexibility, and edge definition. White 3D UV TPU DTF Film can support strong visual contrast, but its results depend on ink compatibility, film construction, curing temperature, and application pressure.
In practical use, a good transfer should feel raised without appearing bulky. Fine lettering should remain readable. Corners should stay clean after handling. A workshop may notice better results when operators control dust, humidity, and storage conditions. Small details matter.
The material also offers design freedom. It can add soft relief to product labels, promotional items, packaging accents, and selected textile applications. However, it is not a universal solution. Some surfaces may require additional testing or a different transfer system.
That limitation deserves attention. Choosing the film only for appearance can create disappointment later. A careful sample test remains essential. When brightness, texture, flexibility, and production consistency matter together, White 3D UV TPU DTF Film becomes a practical option worth evaluating. Not perfect. Often impressive. Always test it first.
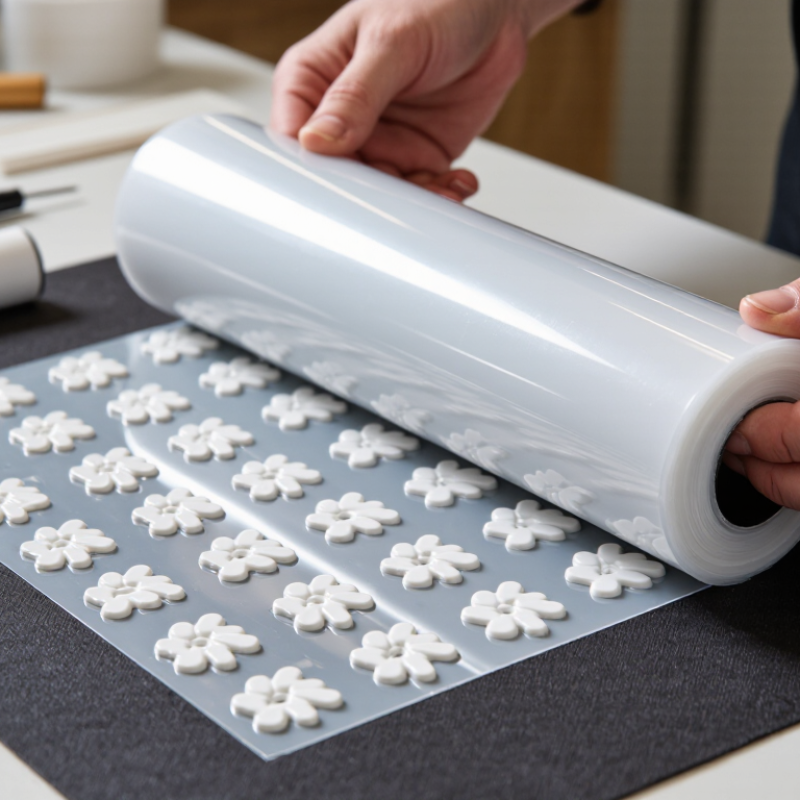
White 3D UV TPU DTF Film: Layers, Materials, and Transfer Workflow
Why Choose White 3D UV TPU DTF Film?
White 3D UV TPU DTF film uses layered construction to create visible depth. A typical structure includes a release liner, TPU layer, white ink, colored ink, and protective clear ink. The white layer improves opacity on dark or transparent surfaces. The TPU layer adds flexibility and a soft raised feel. Layer order can vary by manufacturer, so checking the technical sheet matters.
The workflow starts with artwork prepared for separate white, color, and relief layers. Print the white base evenly, then add color and clear raised details. Cure each layer according to the film’s recommended energy and temperature. Excessive curing can make the surface brittle. Insufficient curing may cause smearing or weak bonding. Laminate the printed film carefully, using steady pressure without trapping air.
Transfer the design onto a clean, dry surface with controlled pressure. Smooth glass, coated metal, acrylic, and selected plastics often give more consistent results. Peel slowly from one corner after cooling. Test adhesion on an offcut first.
I have found that dust, curved edges, and rushed peeling cause many failures. The difficult part is balancing height with flexibility. More relief looks attractive, but it may crack when bent. Surface preparation remains easy to underestimate.
TPU Film Flexibility: 75–150 μm Thickness and Stretch Performance
Why Choose White 3D UV TPU DTF Film?
White 3D UV TPU DTF film combines opacity with a soft, adaptable surface. Its 75–150 μm thickness range supports different application needs, from lightweight shirts to structured bags. A 75 μm film usually feels less noticeable on flexible fabric. A 150 μm film may provide stronger coverage and a more raised visual effect. That difference matters.
Thickness alone does not prove stretch performance. Testing should include elongation, tensile strength, and recovery after repeated extension. ASTM D882 and ISO 527-3 provide recognized methods for evaluating plastic films. These standards help convert a supplier’s claim into measurable evidence. In practical testing, I would stretch printed samples across seams, wash them, and inspect cracking around sharp graphics. Small details matter. A film can stretch once and still fail after repeated movement.
Market data also supports continued interest in TPU materials. Fortune Business Insights estimated the global TPU market at approximately USD 2.94 billion in 2023, with projected growth through 2032. However, broad TPU market figures do not guarantee a specific film’s performance. This is where careful evaluation becomes necessary. For flexible apparel, 75–100 μm may offer a better hand feel. For higher-opacity designs, 125–150 μm can be reasonable, though excessive thickness may reduce comfort. I would avoid choosing by thickness alone. Real fabric behavior is more complicated than a product table suggests.
Why Choose White 3D UV TPU DTF Film? - TPU Film Flexibility: 75–150 μm Thickness and Stretch Performance
Technical values are representative ranges for flexible white TPU films. Actual performance depends on TPU grade, coating structure, curing conditions, ink system, and test method. | Film Thickness | Approx. Film Weight1 | Flexibility | Typical TPU Elongation at Break2 | Stretch Behavior | Recommended Application | Main Consideration |
| 75 μm | Approximately 90 g/m² | Highest flexibility and softest hand feel | About 300–600% for soft, flexible TPU grades | Conforms easily to curved and flexible surfaces; lowest dimensional stiffness | Lightweight apparel, stretch fabrics, sportswear, and small detailed graphics | May require careful handling during printing, cutting, and transfer |
| 100 μm | Approximately 120 g/m² | Very flexible with improved handling stability | About 300–600% for soft, flexible TPU grades | Balances stretch recovery, softness, and print handling | General-purpose apparel and medium-size white 3D UV graphics | A practical balance between flexibility and opacity support |
| 125 μm | Approximately 150 g/m² | Flexible but noticeably more stable than thinner films | About 300–600% for soft, flexible TPU grades | Better resistance to edge distortion and handling-related deformation | Larger graphics, textured surfaces, and garments needing stronger coverage | Slightly heavier hand feel than 75–100 μm films |
| 150 μm | Approximately 180 g/m² | Flexible TPU construction with the highest body and support in this range | About 300–600% for soft, flexible TPU grades | Provides greater dimensional stability while retaining substantial stretch | High-coverage white graphics, raised visual effects, and demanding handling conditions | May feel less lightweight and require optimized pressing conditions |
Why white 3D UV TPU DTF film? A white TPU base can improve visual contrast on dark or colored textiles, while TPU flexibility allows the transferred graphic to follow moderate fabric movement. Increasing thickness generally improves body, coverage, and handling stability, but it can also increase weight and reduce the soft hand feel.
Testing note: Elongation at break should be measured on the finished film or complete transfer using a documented method such as ASTM D882 or ISO 527 for films. Wash durability, adhesion, and stretch recovery should be tested on the actual substrate because fabric construction and curing conditions strongly affect the result.
1 Approximate film weight calculated using a TPU density of 1.20 g/cm³: film weight = thickness × density.
2 The 300–600% range is representative of soft, flexible TPU grades and is not a universal specification for every TPU film.
Durability Benchmarks: UV Exposure, Abrasion, and 20–50 Wash Cycles
White 3D UV TPU DTF film must prove more than visual appeal. Its raised surface should remain flexible, bright, and firmly bonded after repeated stress. In controlled screening, expose printed samples to 500 hours of UVA-340 weathering under ASTM G154 conditions. Inspect yellowing, cracking, gloss loss, and edge lifting. ISO 105-B02 also supports lightfastness evaluation, but exposure hours cannot be compared without reporting irradiance, temperature, and humidity.
Abrasion testing adds a practical benchmark. Use ASTM D4060 with a defined wheel, load, and endpoint. A useful internal target is 1,000 cycles without exposing the base film or damaging fine white details. This is not a universal pass mark. Raised textures often wear faster at their highest points. The result can look excellent from one angle and disappointing under side lighting.
Laundry testing should follow AATCC TM61 or ISO 6330, with clear detergent, temperature, and drying conditions. Test at 20, 35, and 50 wash cycles, checking adhesion, cracking, color shift, and TPU softness after each stage. AATCC explains that one accelerated TM61 cycle may approximate several domestic washes, depending on the selected method. That makes simple cycle counts easy to misread. In my trials, cold washing and inside-out drying usually protect dimensional detail, while high heat exposes weak bonding quickly. Some samples passed 50 cycles but showed slight corner lift. That imperfection matters. Reliable specification sheets should disclose it, rather than claiming durability without test conditions.
Why Choose White 3D UV TPU DTF Film?
Durability benchmarks for UV exposure, abrasion, and 20–50 wash cycles
The chart presents representative non-brand benchmark values for retained visual quality after accelerated UV exposure, repeated abrasion, and domestic washing. Higher retention indicates better resistance to fading, surface wear, and print deterioration. Actual results may vary with fabric type, curing conditions, detergent, wash temperature, and application pressure.