How to Choose the Best Shot Blasting Tools for Your Needs?
Choosing Shot Blasting Tools starts with the surface, not the machine catalogue. The 2016 NACE International IMPACT study estimated that corrosion costs the global economy US$2.5 trillion annually, or 3.4% of global GDP. It also reported that better corrosion-control practices could save 15–35% of those costs. The study does not measure blasting equipment performance, but it shows why surface preparation deserves careful attention. A poorly prepared steel plate can undermine a coating, even when the coating itself is high quality.
Match the equipment to the job. A wheel-blast cabinet may suit repeatable work on small castings, while a portable pressure-blast system can reach larger structures and awkward corners. Check the workpiece size, required finish, abrasive type, available air supply, dust collection, and recovery system. Look for measurable details, such as abrasive flow rate, production capacity, and the surface profile specified for the coating. Then compare maintenance needs and operator controls. Small details matter.
A powerful machine is not automatically the best choice. Nor is the cheapest one. Manufacturer claims can be useful, but ask how they were tested and whether the conditions match your site. I would also leave room for a trial on representative material; real surfaces can be less predictable than brochures suggest. The right Shot Blasting Tools should deliver a consistent finish without wasting abrasive, energy, or operator time. It is a practical balance, and sometimes an imperfect one.
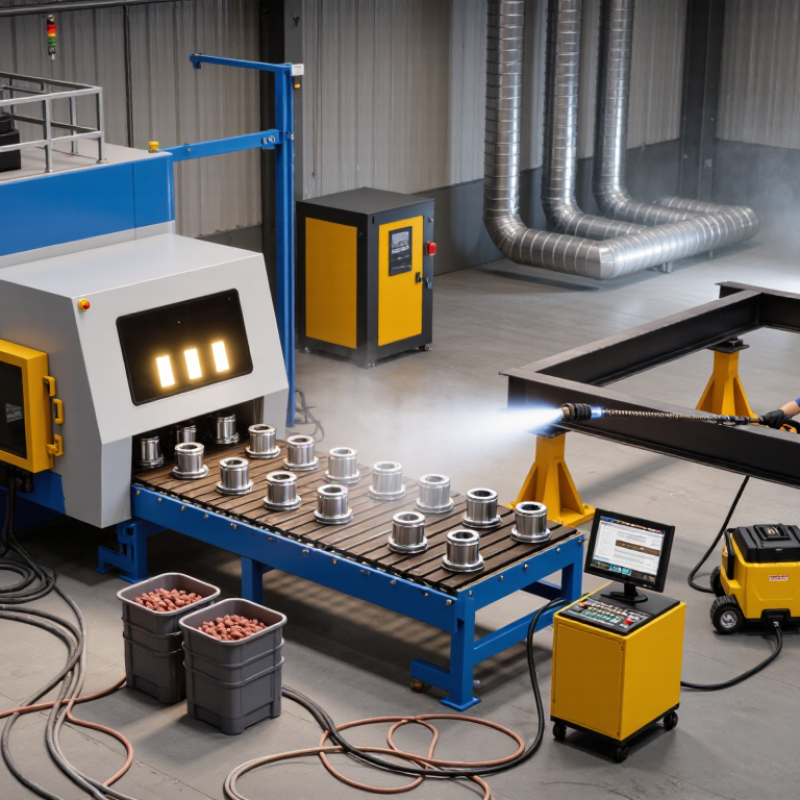
Define Finish Targets with ISO 8501-1 Sa 2½ and Profile in µm
Choosing shot blasting tools starts with the finish your coating requires. ISO 8501-1 Sa 2½ describes a very thorough visual level of blast cleaning: visible oil, grease, dirt, mill scale, rust, and old coatings must be removed, with only slight staining permitted. It does not define surface profile. That distinction matters. A steel panel may look clean but still have an unsuitable anchor pattern.
Set a profile target in micrometers from the coating specification, then choose abrasive type, size, and machine settings to reach it. Angular grit generally cuts a sharper pattern; rounded shot tends to peen the surface. Check the result with an agreed method, such as replica tape or a suitable profilometer, and record readings across several locations. Small differences matter. Too little profile can weaken adhesion; too much may leave peaks exposed beneath a thin coating. Inspect under clear lighting, and remove dust before painting. Sa 2½ alone does not confirm surface salts or dust levels, so verify those separately when the project requires it. Real surfaces vary, and one setting may not suit every panel.
How to Choose the Best Shot Blasting Tools for Your Needs? - Define Finish Targets with ISO 8501-1 Sa 2½ and Profile in µm
Choose equipment and abrasive to meet both the specified cleanliness and surface-profile requirements. Sa 2½ is a visual cleanliness grade; it does not specify a surface-profile value.
| Project need | Suitable blasting tool and abrasive | Typical profile guide (µm) | Selection notes |
| Low-to-moderate profile; reusable media | Pressure blast system with rounded steel shot | About 25–50 | Shot produces a generally less angular profile than grit. Confirm that the coating specification allows the resulting profile and that the shot is suitable for the substrate and equipment. |
| General-purpose coating preparation | Pressure blast pot or wheel-blast machine with angular steel grit | About 50–100 | A common choice when an angular anchor pattern is required. Grit size, hardness, operating conditions, and the workpiece all affect the achieved profile. |
| Higher profile for specified heavy-duty systems | Pressure blast system with coarse angular steel grit or suitable mineral abrasive | About 75–125 or as specified | Use only when the coating data sheet or project specification calls for this range. Check that the profile does not exceed the coating system’s permitted maximum. |
| Field work or complex, localized areas | Portable pressure blast equipment with a compatible angular abrasive | Set by abrasive and process; verify on the surface | Select nozzle size, air supply, and abrasive feed for the task. Control dust, rebound, containment, and worker exposure; use the required protective equipment. |
| Controlled production of uniform parts | Enclosed wheel-blast machine with a specified shot or grit mix | Process-dependent; establish by trial and inspection | Useful for repeatable batch processing. Maintain abrasive condition, wheel settings, and coverage, and confirm the result against the job’s cleanliness and profile requirements. |
Verification: ISO 8501-1 Sa 2½ describes visual blast-cleaning cleanliness, with only slight staining or shading permitted within the standard’s criteria. Determine the required profile from the coating or project specification, then measure it using an agreed method, such as ISO 8503 surface-profile comparison or a suitable profile-measuring instrument. The profile ranges above are practical selection guides, not guaranteed results; abrasive size and shape, blast settings, substrate, and measurement method affect the outcome.
Choose Wheel or Air Blasting for Part Geometry and Throughput
Wheel blasting is often the better fit for batches of similar, sturdy parts. A rotating impeller throws abrasive across a broad, repeatable path inside an enclosed machine. Think flat plates, castings, or steel profiles that can travel on a conveyor. It can process many parts with limited manual handling. But recessed corners may stay shadowed, and delicate edges can wear faster than expected. Geometry still matters.
Air blasting offers more control for large components, irregular shapes, and hard-to-reach areas. An operator can angle a nozzle into a narrow recess or treat one weld without blasting the entire surface. The trade-off is slower coverage and greater dependence on operator technique. Compressed air also carries an energy cost. The U.S. Department of Energy’s Improving Compressed Air System Performance sourcebook reports that compressed-air systems use about 10% of electricity in U.S. manufacturing, and can exceed 30% at some plants. That figure covers whole systems, not blasting alone, so it is a guide—not a machine-to-machine comparison. For high-volume, repeatable work, compare wheel-blast capacity and media recovery. For mixed parts, test air blasting on the deepest recess and most fragile edge. A small trial helps. Throughput estimates can look neat on paper; real loading and handling often complicate them.
How to Choose Shot Blasting Tools
Wheel blasting suits high-volume processing and consistent coverage; air blasting offers greater control for complex shapes and targeted work.
How to read this: Ratings are a qualitative selection guide from 1 (less suitable) to 5 (more suitable), not measured production data. Actual throughput and access depend on part size, equipment setup, abrasive, and process requirements.
Match Abrasive Media Using SAE J444 Size and Shape Classifications
How to Choose the Best Shot Blasting Tools for Your Needs?
Match Abrasive Media Using SAE J444 Size and Shape Classifications
Start with the surface and finish you need. SAE J444 size designations describe cast steel shot and grit by sieve analysis, helping you compare particle sizes consistently. Smaller particles can reach narrow recesses and produce a finer texture. Larger particles may remove scale faster, but can leave a deeper profile. Check the full size distribution, not only the nominal grade; two batches with the same label may behave differently.
Shape matters too. Round shot tends to peen surfaces with repeated impacts, while angular grit cuts and removes coatings or rust. Use the media form suited to the task, then confirm the actual particle condition. Worn grit can become rounded, and broken shot may create unwanted sharp fragments. I still find shape easy to misjudge from a sample jar alone. A closer inspection helps. Match media to the machine, too: oversized particles may feed poorly through smaller wheels or nozzles.
Tips: Compare the J444 grade and sieve data on the supplier’s technical sheet. Inspect a handful under magnification, and test a small area first. Record the finish and cleaning time; your first choice may need adjustment.
Size Equipment for Abrasive Flow, Nozzle Wear, and Production Rate
How to Choose the Best Shot Blasting Tools for Your Needs?
Size Equipment for Abrasive Flow, Nozzle Wear, and Production Rate
Choosing shot blasting equipment starts with the workpiece and the finish you need. Estimate abrasive flow from the surface area, coating condition, and target cleaning speed. Then check that the machine, hose, and nozzle can maintain that flow without excessive pressure loss. A nozzle that is too small may slow production; one that is too large can demand more air and abrasive than your system can supply. Small changes matter.
Nozzle wear is easy to overlook. As its opening enlarges, abrasive consumption and air demand can rise, while the blast pattern becomes less consistent. Inspect the nozzle regularly and record its opening size, operating hours, and pressure readings. Replace it when wear affects the process, not just when it looks old. Production rate also depends on operator movement, part geometry, and time spent handling components. A fast machine cannot make up for a poorly planned workflow. There is no perfect estimate; test on a representative part and adjust.
Tips: Match nozzle size to your available air volume, not just the compressor’s headline rating. Track abrasive use per shift and compare cleaned area or parts per hour. If output drops, check nozzle wear, leaks, and abrasive condition before increasing pressure. Measure again after each adjustment.
Plan Dust Controls Around OSHA’s 50 µg/m³ Silica Exposure Limit
When choosing shot blasting tools, plan dust control before comparing power or coverage. OSHA’s permissible exposure limit for respirable crystalline silica is 50 micrograms per cubic meter, averaged over an eight-hour workday; the action level is 25. These are exposure benchmarks, not proof that a machine is safe. Blasting concrete or masonry can release respirable silica, while steel shot used on clean steel presents a different dust profile. Check the substrate, coating, abrasive, and safety data before selecting your setup.
Choose equipment that captures dust at its source: an enclosed cabinet for small parts, or a sealed blasting system with extraction for larger work. Match the collector’s airflow and filter capacity to the tool, then check gauges and seals during operation. Dust travels. A cloud near a door, hose joint, or workpiece is a warning, but clear air does not confirm exposure is below the limit. Use exposure monitoring where needed, maintain filters, and clean with a suitable HEPA vacuum. Avoid dry sweeping or blowing dust with compressed air. Respirators may be needed when engineering controls cannot adequately limit exposure. Fit matters. A common mistake is buying a powerful blaster first and treating dust collection as an accessory. That can mean costly retrofits—and an uncomfortable question: what did the air sample actually show?